
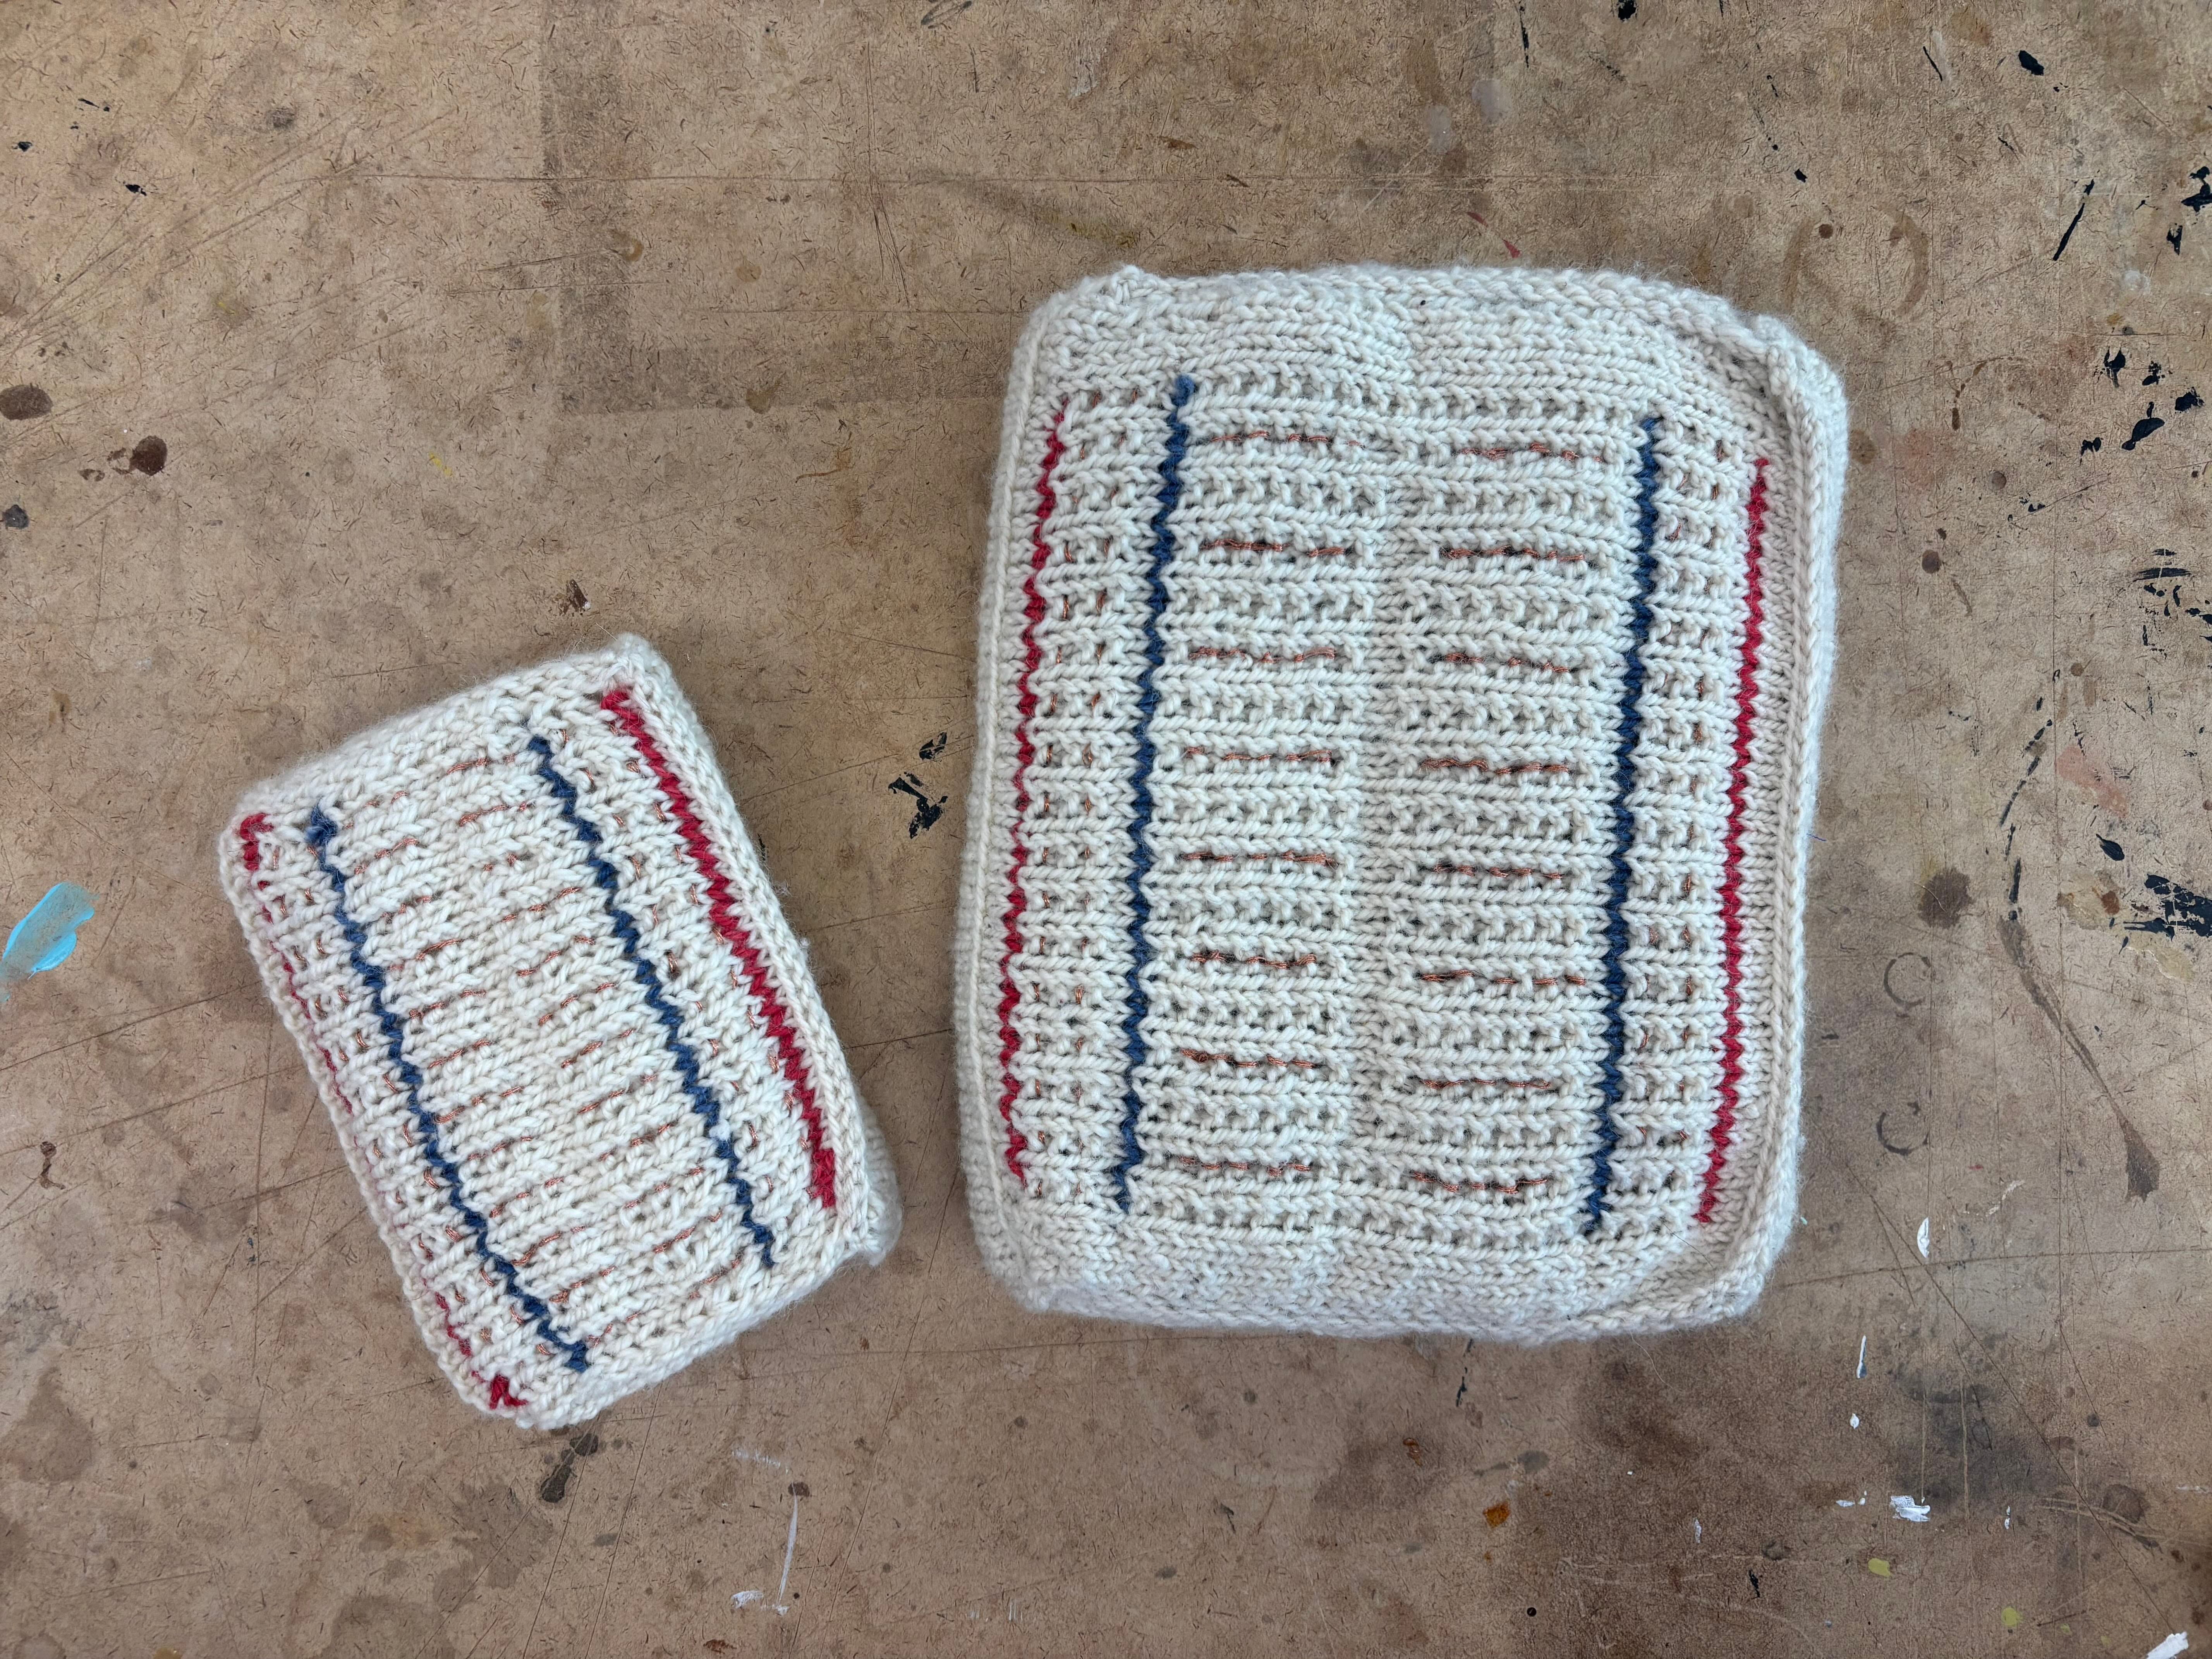
On the right, the original threadboard, clocking in around 12in x 9in / 30cm x 22cm; on the left, the tutorial threadboard, about 7in x 5in / 18cm x 12cm.
Hi! I’m Alanna Okun, a writer, crafter, and amateur programmer living in New York City. I recently left a twelve-year career in journalism to pursue a master’s degree in creative technology. I’ve been teaching myself to make games and other interactive work for a few years now; I document that process in this newsletter.
In February, I helped out at the ITP Stupid Hackathon at school, where participants are encouraged to make projects no one asked for. I came in with an idea: a hand-knitted, functioning breadboard.
The breadboard is a cornerstone of electronic education and prototyping — a rectangular waffle that conducts electricity in configurations of columns and rows, for determining where wires and components should connect to one another before more permanent measures like soldering. They’re grids, the bare canvas of so many kinds of patterns. Generally made of plastic, I wanted to see if I could make one out of my personal favorite material: yarn.
In the week leading up to the one-day hackathon, I knitted the body; the day of, I concentrated on making it actually look and work like a breadboard by knitting the face and embroidering the common connections with conductive thread.
Much of my day was spent debugging: figuring out what was going wrong when it didn’t function the way it should, which largely consisted of making sure connections were strong and sturdy enough while keeping them from overlapping with one another.
And so: the threadboard, an extremely literal interpretation of textiles-as-electronics. (Which have a rich history and community of practitioners in their own right.)
I am, to be clear, proud of this thing; mostly it achieves stupidity, per the terms of the hackathon, by way of its frivolity, its scale, and its relative flammability. (Although I took care to use 100% wool, which is about as insulating as you can get from a textile.) I laughed out loud the first time I got what is basically a glorified lumbar pillow to power a tiny toy motor. Either way, I wouldn’t have pursued this line of thinking without the hackathon prompt or the time constraints.
It’s emblematic of something I’ve been thinking about a lot since returning to school: when and how skills or associations I’d picked up previously can be useful (or limiting) when it comes to learning entirely new things. Textiles are, for me, an extremely helpful metaphor when it comes to learning about code and electronics.
This semester I’m taking a class with the irresistible title Electronics for Inventors, which I’m enjoying a lot and also somewhat terrifies me. I spent the first couple weeks feeling basically sub-literate, unable to interpret even the most rudimentary circuit diagrams, let alone finish in-class lab assignments.
What made it all start to gel was seeing the diagrams as what they, at bottom, are: patterns, like in knitting or needlepoint. Row by row, stitch by stitch, the pitter-patter rhythm of the knits and the purls — the 1s and the 0s — adding up to the whole. The breadboard itself, the location of all of these experiments, felt less like a hostile piece of equipment to be tamed and more like an inviting canvas.
As my Electronics professor likes to say about overly pat metaphors, “It’s not exactly like that;” still, the principle is similar enough to give me, most of the time, an entry point, if not the codex to a full translation.

When I finished, I posted some photos and videos of the piece on social media, and was frankly kind of stunned by the volume of the response. (I was un-stunned by the number of replies from men explaining to me how electricity works. Like………………………..I know!)
A number of folks reached out asking for a tutorial / documentation of the build process. This particular set of instructions is for a close-to-IRL-breadboard-sized version; the one I made at the Hackathon is much larger, more seat cushion than coin purse.
It’s intended to be a recipe rather than a prescription, to be riffed on. Feel free to use the materials you have on hand, and to play around with size and scale.
Just use common caution when it comes to electronics — good-quality conductive thread and properly rated components can determine whether the thing actually conducts electricity or not. (Or zaps you!)
You could just use the directions for the face to make a flat panel without bothering with the rest of the body, say, if you wanted to apply it to a sweater or interactive tapestry or musical interface or something.
I’d love to see what you make, and to hear about any spots that might have tripped you up in this documentation, as it’s still a work in progress — get in touch at alanna.okun@nyu.edu or on Instagram at @alannabean.
Materials
~50 yards / 45 meters white or cream-colored DK yarn in a natural fiber like wool or cotton (or whatever main color / weight you’d like to use for the body)
~Several yards / meters each red and blue yarn (or whatever color(s) you’d like to use for the rails — should be the same weight and fiber type as your other yarn)
~50 yards / 45 meters conductive thread (two of these guys should be plenty, for example)
Size 6 needles, straight or circular (or whatever size matches your yarn; gauge doesn’t matter a ton here but shouldn’t be too tight or loose)
Sewable coin cell battery holder + appropriate battery (1.5V - 3V)
Alligator clips
LED(s) or DC hobby motor (rated for appropriate battery voltage)
Tapestry needle
Scissors
You don’t need a multimeter, especially if you’re like what the hell even is that, but it can be very helpful for troubleshooting
Knitting
Here’s a schematic-slash-colorwork chart (read starting in the upper lefthand corner from left to right and top to bottom) to give a rough idea of how the piece is put together, followed by a written pattern.
The body is constructed as a connected series of flaps whose remaining edges are seamed together at the end.
The face — the breadboard-y part of the threadboard — is knitted last and then embroidered with conductive thread.

BODY
Cast on 45 stitches with main color (MC)
// this is the width of the total piece
Knit in stockinette for 10 more rows
// stockinette = knitting on the “right” side & purling on the “wrong” side
// slip 1st stitch or 2 of each row knitwise for more defined edge
>> don’t worry bc it’s all getting seamed up at the end anyway though
// this is the height of the total piece
With wrong side facing you, knit 1 row
// leaves a line of purl ridges on the right side
>> useful for folding the fabric
>> and demarcating where a given panel ends
At the end of the row, cast on 12 stitches (st)
// 57 stitches total
Knit 12 st (k12); slip 1 st knitwise (sl1k); knit 45 st; slip 1 st knitwise; cast on 12 st
// 69 stitches total
Purl across (p69)
k12, sl1k, k45, sl1k, k12
p69
Repeat these 2 rows for 30 more rows
// this is the depth of the total piece
Cast off 12st knitwise; sl1k; p45; sl1k; cast off 12st knitwise. Break yarn.
With right side facing you, reattach yarn to rightmost knit stitch and k45 across
p45
k45
Repeat these 2 rows for 10 more rows
With wrong side facing you, k45
// this will leave purl ridges on the right side
FACE
k45 (MC). Break yarn.
With wrong side facing you, attach secondary color 1 (SC1); p45; break yarn
With right side facing you, attach MC; p1k1 across
// this is the start of waffle stitch, which forms the holes on the breadboard
p45
p1k1 across
With wrong side facing you, attach secondary color 2 (SC2); p45; break yarn
With right side facing you, attach MC; p1k1 across
p45
p1k1 across
Repeat these 2 rows for 6 rows
p45
k45
p45
p1k1 across
Repeat these 2 rows for 6 rows; break yarn
With wrong side facing you, attach SC2; p45; break yarn
With right side facing you, attach MC; p1k1 across
p45
p1k1
Attach SC1; p45, break yarn
Attach MC; k45
Bind off knitwise
Weave in all ends
Block if needed
// it’s probably not
// but you won’t be able to block the fabric once the conductive thread has been added
// !!if you do, ensure that it's completely dry before you test electronics!!
Embroidery

From top: Scissors, tapestry needle, conductive thread; the “right” side of the embroidered fabric'; the “wrong” side of the embroidered fabric
Thread the tapestry needle with about 48 in / 120cm of conductive thread or yarn. Double it and secure the end with a double knot — this stuff doesn’t always love to stay tightly bound to itself, and it’s fairly easy to tangle, so take extra care.
Starting at the bottom-left corner of the face of the breadboard, whip stitch up the leftmost rail using the purl ridges as a guide — go over, around, and under the purls in order to create a firm path that’s neither too tight nor too loose.
When you reach the end of the rail, turn and whip stitch back over the stitches you just made to reinforce them.
Tie the end of the working thread to the knotted tail on the wrong side, and secure with a double knot. Do not pull too tight.
Trim ends, being careful not to sever the knot nor leave any loose strands that could cause a short-circuit.
Repeat up and down the near left rail.
Repeat up and down the near right rail.
Repeat up and down the far right rail.
Thread the tapestry needle with about 16 in / 40cm of conductive thread or yarn. Double it and secure the end with a double knot.
Starting at the top left corner of the face of the breadboarrd, whip stitch in the same manner from the leftmost edge of the inner body until the center gap.
Turn and whip stitch back over the stitches you just made to reinforce them.
Tie the end of the working thread to the knotted tail on the wrong side, and secure with a double knot.
Trim ends.
Repeat across the gap to the rightward rail and all the way down the inner body on both sides, tying a new knot and trimming any excess from each row.
You may choose to just make every other row conductive; this is probably sufficient for your purposes, but feel free to embroider all or some other combination of them. I chose to do all for the version shown here.

The most important thing to note here is to make sure rows of conductive thread don’t unintentionally overlap; that could cause a short or otherwise uncooperation from your circuit, and it’s why we’re tying all those knots.
Optional: Reinforce knots on the wrong side and/or insulate traces with fabric or superglue. Let dry completely before testing.
Conductivity
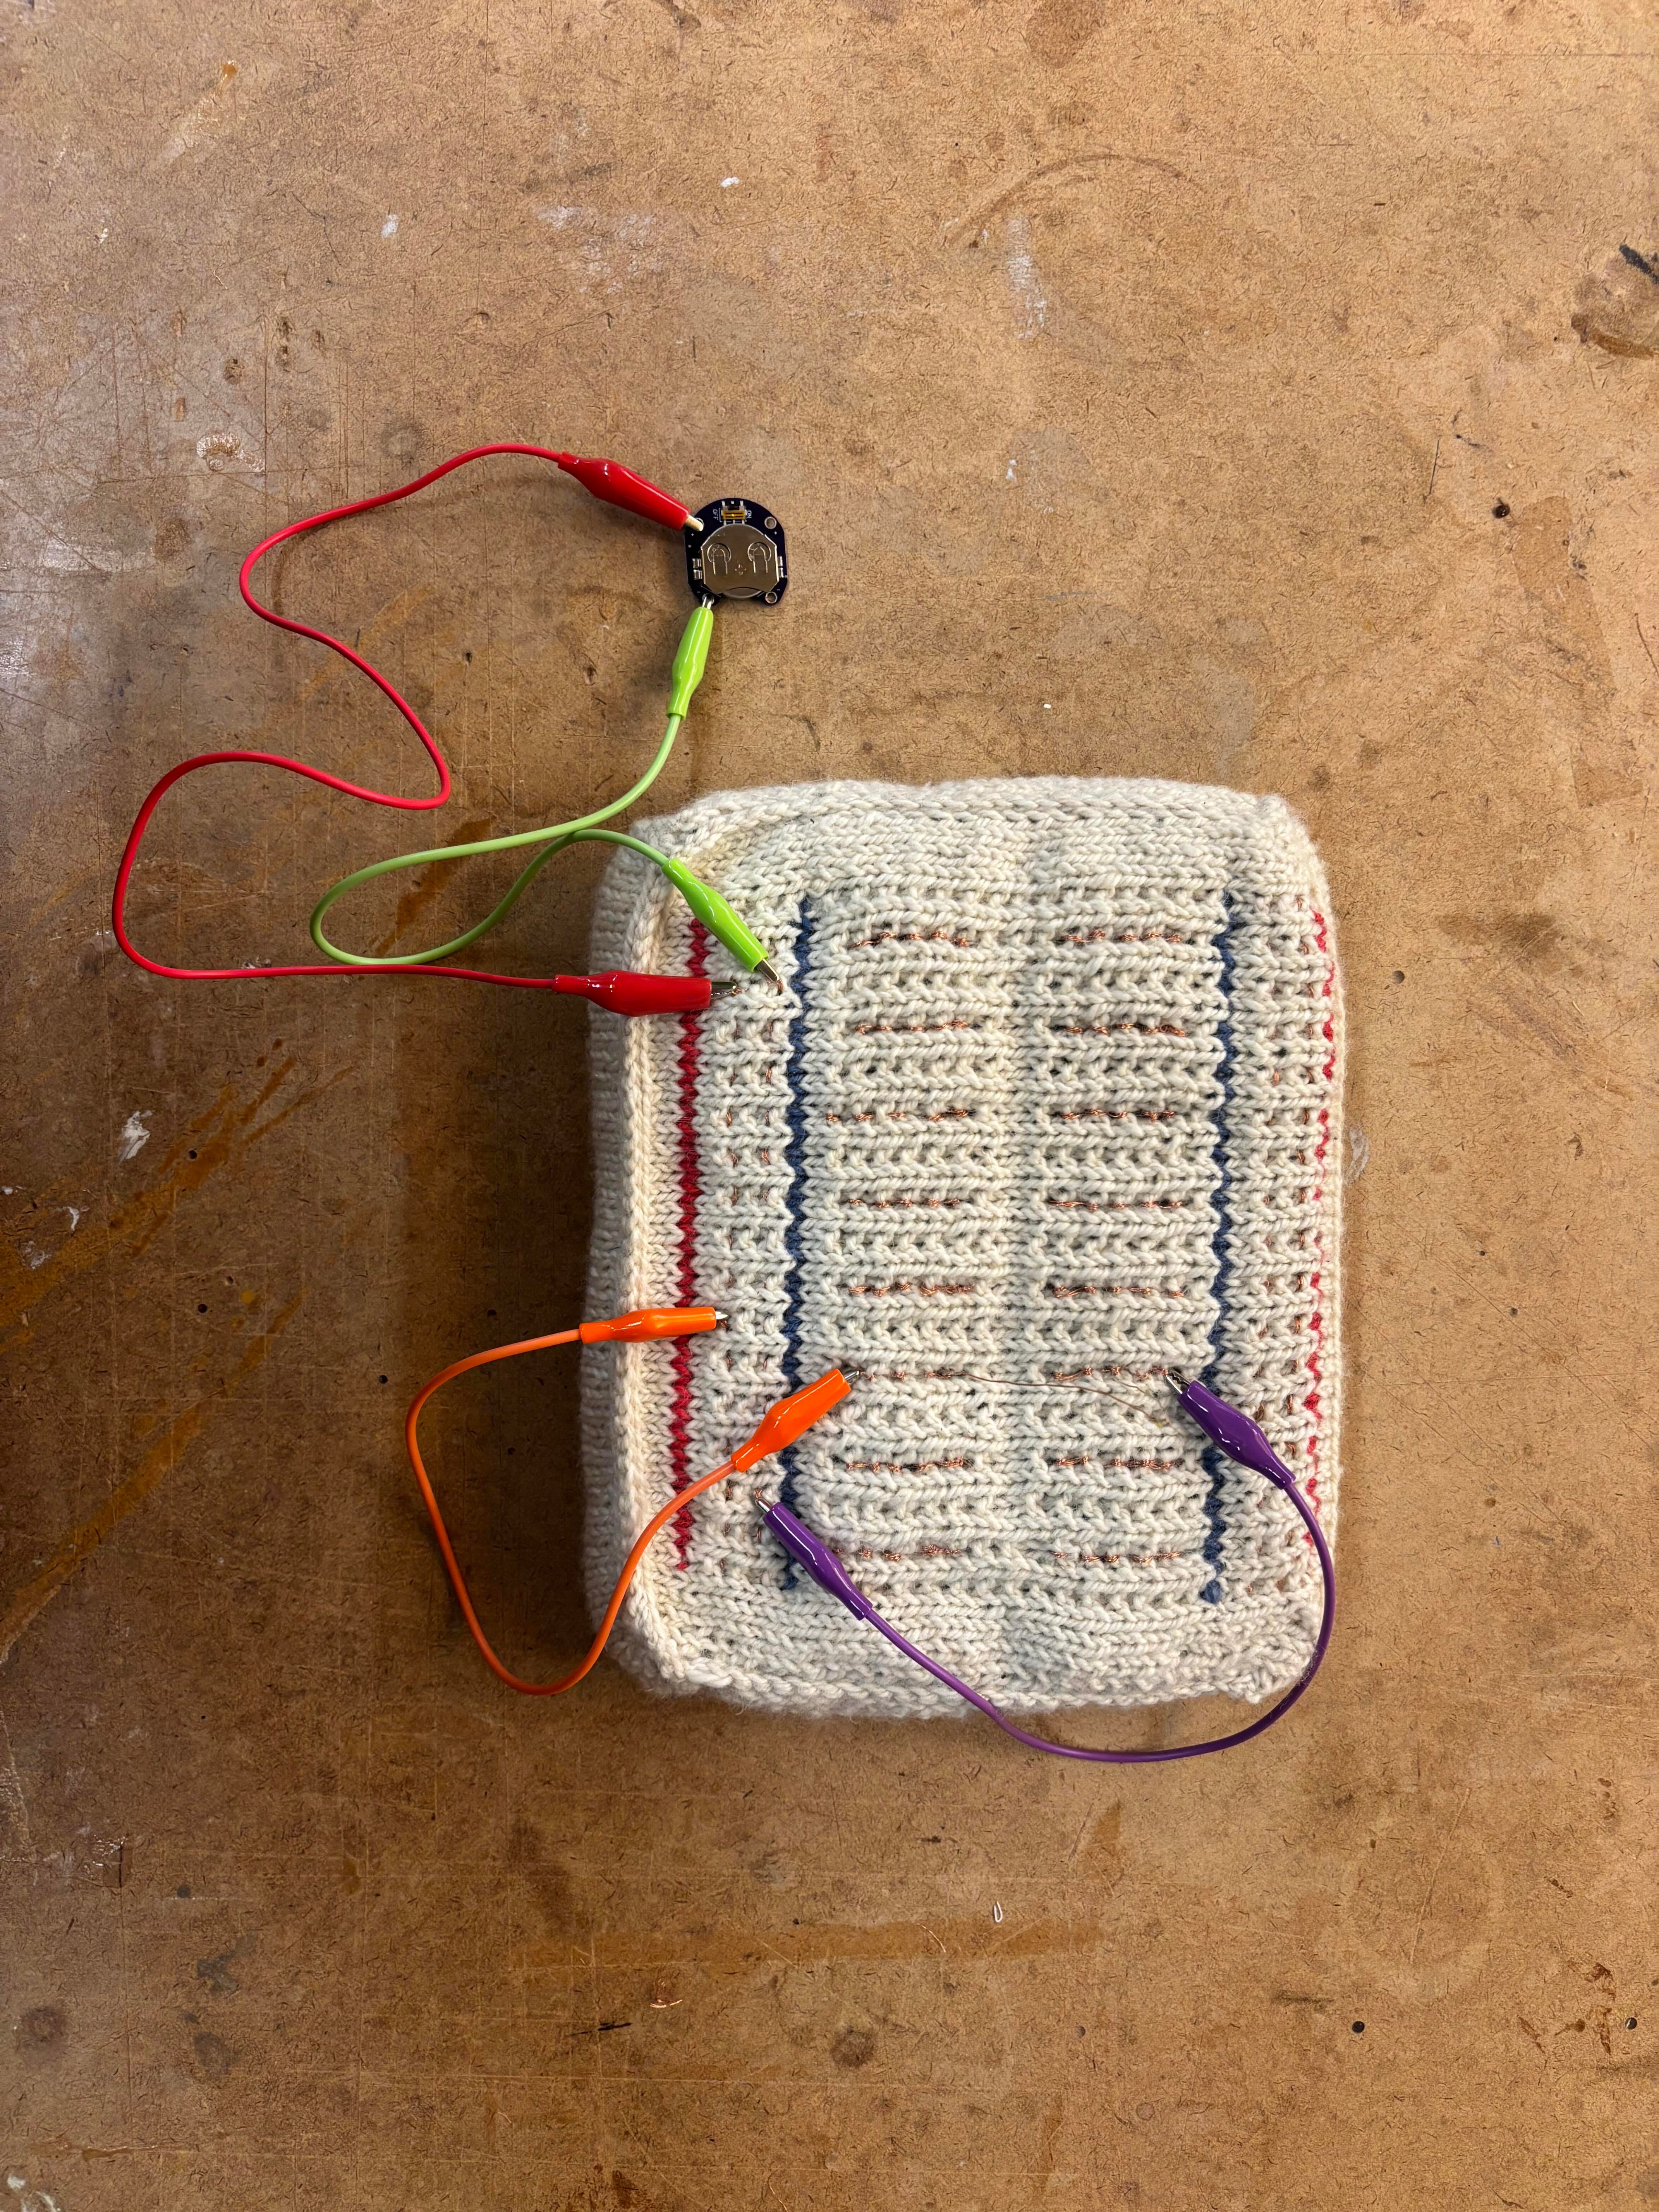
To test, attach one end of an alligator clip to the positive terminal of your coin cell battery holder (with functioning appropriate battery) and the other to the “power” rail of the threadboard.
Attach one end of an alligator clip to the negative terminal of your coin cell battery holder and the other to the “ground” rail of the threadboard.
Appropriately place the two legs of an LED, or the two terminals of DC hobby motor, to test conductivity (or use a multimeter).
If the rails are functional, use another pair of alligator clips to test the rows — run power to one and ground to another from each of the rails, and test your components there.

Finishing
Stuff piece with cotton batting, scraps, or other natural fiber fill.
Seam up all loose edges with single crochet or mattress stitch.
Weave in and trim all ends.
Play around with LEDs, a motor, a speaker, or whatever else you’d like to power.
Safety Tips
Use a power supply between 1.5 - 3V.
Always read the data sheets for any electronic components.
Unplug the power supply whenever it’s not in use.
Don’t get this thing wet and then try to turn it on??? I know you know that but this is the internet so just please don’t!
They’re a little family :)
If you want to support my work, please consider subscribing (free or paid) to my newsletter, and share this tutorial with a friend!
This is a totally unexpected crossover of my interests. Great job!!
This is amazing, and I love it.
Electrical isn't my brand of engineering, and knitting isn't *current*ly in my crafting skillset, I'm now wondering what piece of mechie equipment I could unnecessarily construct via quilting.